Filmora Complete Guide: Features, AI Tools & Editing Tips
The first step in understanding this Filmora Complete Guide is to know what Filmora is and what type of creators it is designed for. Filmora is a video editing software developed by Wondershare for creators who want a balance between easy editing and advanced creative control. It provides a timeline-based editing workflow with tools for trimming, transitions, effects, text animation, audio editing, colour correction, keyframes, motion tracking, masking, screen recording, templates, and AI-assisted editing.
For creators working on YouTube videos, social media content, tutorials, presentations, travel videos, product videos, short-form content, and personal projects, Filmora offers a broad set of tools in one application. This Filmora Complete Guide covers its major editing features, AI tools, audio controls, text options, creative effects, export capabilities, system requirements, pricing, and practical uses.For more practical guides, comparisons, and information about popular photo and video editing apps, you can also explore UniversalEdit.
Why Is Filmora Popular
Video editing has become much more accessible, but that doesn’t mean every editor is easy to learn. Many applications provide powerful controls while making beginners spend considerable time learning complicated interfaces.
Filmora takes a different approach. Its main strength is the balance between accessibility and creative depth. You can start with simple cuts and transitions, then gradually move into keyframes, masks, motion tracking, colour correction, audio processing, and AI tools as your editing skills improve.
I’ve found that this type of workflow can be particularly useful for creators who don’t want to learn several different applications for everyday video projects. Filmora is part of Wondershare’s broader range of creative software, which makes it useful to understand the brand behind the application as well as the editor itself. Filmora combines basic editing, creative effects, audio tools, text animation, templates, and AI features in one workspace. This is also one of the main reasons the Filmora Complete Guide is useful for beginners who want to understand the software before starting a project.
Filmora at a Glance
| Feature | Filmora |
|---|---|
| Developer | Wondershare |
| Main purpose | Video editing |
| Editing style | Timeline based |
| Beginner friendly | Yes |
| AI tools | Yes |
| Colour correction | Yes |
| Keyframes | Yes |
| Motion tracking | Yes |
| Masking | Yes |
| Audio editing | Yes |
| Screen recording | Yes |
| Templates | Yes |
| 4K export | Yes |
| Watermark free export | Available with paid plans |
| Windows | Yes |
| macOS | Yes |
Filmora’s feature set includes timeline editing, audio tools, text controls, AI features, motion blur, pen tools, flicker removal, colour tools, and several creative workflows. These capabilities form the foundation of this Filmora Complete Guide and show why the application can handle more than basic video cutting.
Filmora Features
The Filmora Complete Guide would not be complete without looking closely at the software’s main editing features. Filmora covers most of the tools needed for everyday video production.
Instead of relying only on templates, you can build projects manually and control individual elements on the timeline. This gives you room to create simple edits as well as more detailed projects.
Timeline Video Editing
The timeline is the centre of the Filmora editing workflow. You can place video clips, images, music, sound effects, text, overlays, and other elements on different tracks.
Basic operations such as cutting, trimming, splitting, cropping, resizing, rotating, and rearranging clips can be performed directly from the timeline. This makes Filmora suitable for everything from short social videos to longer YouTube projects.
Trim, Split and Crop
Filmora provides standard editing controls for cleaning up footage before adding creative effects.
You can remove unwanted sections, split long clips into smaller parts, crop the frame, change aspect ratios, and rearrange clips to create a more organised sequence. These simple controls are important for anyone following a Filmora Complete Guide because they form the foundation of almost every video project.
Transitions
Transitions help connect two clips without making the change feel abrupt. Filmora includes a wide selection of transition styles that can be placed between clips.
Simple fades can work well for tutorials and presentations, while more dynamic transitions may suit social media edits. Using too many transitions can make a video feel distracting, so matching the transition style to the content is usually more effective.
Effects
Filmora includes visual effects that can change the appearance and mood of footage. These can be used for creative edits, cinematic sequences, social content, tutorials, intros, and promotional videos.
Effects can be combined with keyframes, masks, blending, and other editing controls to create more customised results. When following this Filmora Complete Guide, it’s worth experimenting with effects after the basic edit is already working.
Filters
Filters provide quick colour and visual changes without manually adjusting every colour parameter.
They can be useful for establishing a consistent look across multiple clips. For more precise results, Filmora also provides colour correction controls instead of requiring you to depend entirely on presets.
Motion Blur
Recent Filmora versions include motion blur for creating smoother-looking movement during fast cuts, zooms, and camera movements.
This can be useful for action sequences, speed effects, transitions, and motion-based edits where movement needs a softer visual appearance.
Filmora AI Features
AI is one of the biggest areas of development in modern editing software. In this Filmora Complete Guide, the AI section deserves particular attention because Filmora now combines traditional timeline editing with AI-assisted creation and automation.
The software includes AI-powered tools covering video, images, audio, text, subtitles, generation, and editing assistance.
AI Copilot Editing
AI Copilot Editing works as an assistant that can analyse your video and provide editing recommendations.
It can help reduce repetitive work and guide creators through common editing decisions. Filmora describes AI Mate as a conversational editing assistant that can help with tasks such as trimming, transitions, and effects.
AI Text-Based Editing
AI Text-Based Editing converts spoken content into editable text. Instead of working only through the visual timeline, you can edit the transcript and use it as part of the video editing process.
This is especially useful for interviews, tutorials, podcasts, talking-head videos, and other speech-heavy content.
AI Smart Cutout
AI Smart Cutout helps isolate subjects and remove unwanted objects or backgrounds.
This can reduce the amount of manual masking required for common editing tasks. It is useful when you want to place a person over another background or remove distracting elements from a shot.
AI Speech-to-Text
Filmora can convert spoken audio into text and use the result for subtitles.
This is helpful for creators producing social media videos, tutorials, interviews, and educational content where captions improve accessibility and viewing convenience.
AI Text-to-Speech
AI Text-to-Speech converts written text into spoken audio. This can be useful for narration, explainer videos, presentations, and content where recording a voiceover isn’t practical.
AI Music Generator
Filmora’s AI Music Generator can create music based on the desired mood or style.
This gives creators another option for developing background music without manually searching through a large collection of tracks. It is one of the AI capabilities worth exploring in a Filmora Complete Guide because audio creation is becoming a larger part of the editing workflow.
AI Audio Denoise
Background noise can reduce the clarity of an otherwise good recording. AI Audio Denoise is designed to clean unwanted noise and improve the overall sound.
It can be particularly helpful for voice recordings made in rooms with fans, air conditioning, outdoor noise, or other distractions.
AI Video Enhancer
AI-powered enhancement tools can help improve the appearance of lower-quality footage.
Filmora’s recent updates include generative enhancement and AI-powered video improvement features aimed at improving clarity and detail in compressed, older, or low-resolution footage.
AI Image Generator
Filmora can also generate images from text prompts. This can help creators produce supporting visuals, backgrounds, concepts, or other assets without leaving the editing application.
AI Text-to-Video
AI Text-to-Video lets creators describe an idea through a prompt and generate video content from that description.
This is useful for concept development, short-form content, visual experiments, and projects where generated footage can complement recorded material.
AI Image-to-Video
Image-to-Video tools can transform still images into moving visual content.
For creators who work heavily with photographs, this can provide another way to introduce motion into otherwise static projects.
AI Video Translation
Filmora also includes AI-assisted video translation features designed to help creators adapt content for different languages.
The feature set includes voice cloning and lip-sync capabilities for supported workflows, giving creators additional options for adapting content for different audiences.
AI Thumbnail Creator
Thumbnails have a direct role in how video content is presented on platforms such as YouTube.
Filmora’s AI Thumbnail Creator is designed to help create thumbnail concepts from video content. This can make the thumbnail creation stage part of the same editing workflow.
Filmora Audio Editing Tools
A detailed Filmora Complete Guide should also cover audio because sound quality can strongly affect the viewing experience.
Good video editing isn’t only about visuals. Poor audio can make a well-edited video difficult to watch, while balanced dialogue, music, and sound effects can make the final project easier to follow.
Audio Ducking
Audio ducking automatically reduces background music when dialogue or other important audio is playing.
This makes spoken content easier to understand without requiring you to manually adjust every music clip.
Audio Synchronisation
Filmora provides tools for synchronising audio with video.
This can be useful when separate audio equipment is used during recording or when external recordings need to be aligned with camera footage.
Beat Sync
Beat synchronisation helps match visual changes with music beats.
This feature can be particularly useful for montage videos, travel edits, social media content, fashion videos, and music-focused sequences.
Silence Detection
Silence detection can help identify silent sections in recordings.
For talking-head videos, tutorials, and interviews, this can reduce manual work when removing unnecessary pauses.
Text and Title Tools
Text is an important part of modern video editing, especially for social media and educational content.
Filmora includes text editing, title templates, text animation, text paths, and other typography controls. These options make text editing another important part of the Filmora Complete Guide for creators who want to produce informative and visually structured videos.
Text Animation
Animated text can introduce titles, captions, labels, calls to action, and other information.
You can adjust movement, timing, position, scale, and other properties to make text fit the visual style of your project.
Text Paths
Text path tools allow text to follow a particular movement or path.
This can be useful for creative introductions, motion graphics, labels, and animated title sequences.
Custom Text Styling
You can customise fonts, sizes, positioning, colours, spacing, and animation behaviour.
Filmora’s recent updates have also added features such as custom text textures, giving creators more control over typography.
Filmora Advanced Editing Tools
Filmora’s advanced editing tools give you more control over how visual elements move, interact, and appear within a video. Keyframes, motion tracking, and masking can be used individually or together to create more controlled and dynamic edits.
Keyframes
Keyframes give you control over how an element changes over time. You can use them to animate position, scale, rotation, opacity, and other supported properties. For example, a photo can slowly zoom in while moving across the screen.
This makes keyframes useful when you want more control than a preset animation provides. Practising keyframes can help you create smoother movements and add more depth to otherwise static elements.
Motion Tracking
Motion tracking allows visual elements to follow movement within footage. You can use tracking for text labels, graphics, effects, callouts, and other objects that need to remain connected to a moving subject.
For example, if a person is walking across the frame, a text label can follow the subject’s movement instead of remaining fixed on the screen. This makes motion tracking useful for tutorials, social media edits, presentations, and creative video projects.
Masking
Masks let you control which parts of a clip are visible. They can be used for creative transitions, selective effects, subject isolation, overlays, and compositing.
Filmora’s masking tools become particularly useful when you start working with layered compositions. You can combine masks with keyframes and motion tracking to create more precise effects and control different areas of your footage.
Colour Correction and Colour Grading
Colour plays a major role in the visual identity of a video. A proper Filmora Complete Guide should therefore include both basic colour correction and creative colour grading.
Filmora includes controls for adjusting elements such as HSL, RGB curves, white balance, sharpening, HDR, and LUT-based colour workflows.
White Balance
White balance helps correct unwanted colour casts caused by lighting conditions.
Correcting white balance before applying a creative colour style usually produces a more consistent result.
HSL
HSL controls let you adjust hue, saturation, and lightness for specific colour ranges.
This can be useful when you want to change the appearance of a particular colour without dramatically affecting the rest of the image.
LUTs
LUTs can apply a predefined colour look to footage.
They are useful when you want a repeatable visual style across multiple clips, although footage should generally be corrected first so the LUT behaves more predictably.
Filmora Editing, Assets and Export Tools
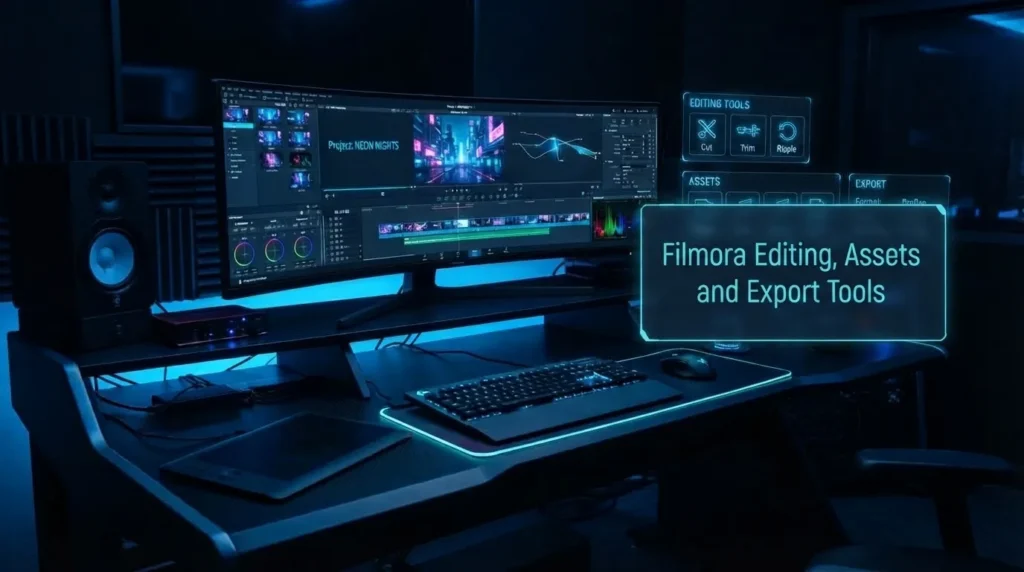
Filmora provides several tools that can help creators move from basic editing to a more complete video production workflow. Speed controls, templates, creative assets, screen recording, and export options cover different stages of the editing process.
Speed Editing
Speed changes can make an ordinary clip more dynamic. Filmora supports speed adjustments and speed related editing workflows for slow motion, fast motion, speed ramps, and rhythmic edits.
These controls are useful for sports clips, travel videos, action footage, music edits, and social media content. Creators following a Filmora Complete Guide can use speed adjustments to add variation and improve the pacing of their videos.
Templates and Creative Assets
Templates can reduce the time required to create common video formats. Instead of building an entire project from an empty timeline, creators can start with a predefined structure and replace the media, text, effects, and other elements.
Filmora also provides a Creative Assets ecosystem that includes stock media, music, sound effects, video effects, plugins, and other resources. The exact selection and availability can depend on the chosen plan and asset subscription.
Templates can save time, but they work best as a starting point rather than a complete editing solution. The creator still needs to choose suitable footage, music, timing, and text to make the final video fit its purpose.
Screen Recording
Filmora also supports screen recording, making it useful for software tutorials, educational content, demonstrations, walkthroughs, presentations, and gaming related videos.
Recent versions have expanded its recording workflow with features such as window recording and teleprompter related functionality. This allows creators to record on screen activity while keeping the editing and production process within the same application.
Export Options
After editing is complete, Filmora provides export options for different formats, resolutions, frame rates, and aspect ratios. Paid plans can provide features such as watermark free exports and 4K HD export, depending on the plan and platform.
Before exporting, check the resolution, frame rate, aspect ratio, and compression settings. Choosing the highest setting for every project isn’t always necessary, since the best export configuration depends on the original footage and the platform where the video will be published.
Filmora for YouTube, Social Media and Video Editing
Filmora can be a practical choice for YouTube creators who need a mixture of straightforward editing and creative features. You can cut footage, add B-roll, create titles, clean audio, add captions, use transitions, apply colour adjustments, and export the final video from the same application.
It works well for tutorials, commentary videos, educational content, travel videos, product videos, reviews, and talking-head content. For short-form platforms, Filmora can also be used to create vertical videos for TikTok, Instagram Reels, and YouTube Shorts using tools such as templates, speed controls, captions, text animation, effects, beat synchronisation, and AI-assisted editing.If you’re also interested in mobile focused editing, our KineMaster Complete Guide covers its editing tools, features, and workflow in more detail.
The editing software itself doesn’t determine whether a video will perform well. Footage quality, pacing, story structure, audio, and the opening seconds still play an important role.
How to Edit a Video in Filmora
If you’re new to Filmora, you don’t need to learn every feature before creating your first project. This practical section of the Filmora Complete Guide provides a simple workflow that can help you move from raw footage to a finished video.
1. Create a New Project
Open Filmora and start a new project using the appropriate aspect ratio and resolution. Choose settings based on the footage you plan to edit.
2. Import Your Media
Import your videos, photographs, music, voice recordings, and other assets. Organising files before editing can make larger projects easier to manage.
3. Build the Rough Cut
Place your main footage on the timeline and remove unnecessary sections. Focus on the story first instead of spending too much time on effects.
4. Add Supporting Footage
Add B-roll, images, screen recordings, or other visual elements where needed. These additions can improve visual variety and make explanations easier to follow.
5. Add Audio
Add background music, voiceovers, or sound effects. Adjust the levels so dialogue remains clear and background music doesn’t compete with important speech.
6. Add Text and Captions
Add titles, subtitles, labels, or other text elements. Keep text readable on smaller screens and avoid placing important information too close to the edges.
7. Apply Colour Adjustments
Correct exposure and white balance before applying a creative look. This can help maintain more consistent colours across different clips.
8. Add Effects and Transitions
Use effects and transitions where they support the content. A simple cut can often work better than an elaborate transition that doesn’t add anything meaningful.
9. Review the Entire Video
Watch the complete project before exporting. Look for awkward cuts, audio jumps, spelling mistakes, inconsistent colours, unnecessary pauses, and distracting effects.
10. Export
Select the appropriate resolution, frame rate, format, and quality settings based on the platform where you plan to publish the video.
Filmora System Requirements, Pricing and Suitability
Filmora’s supported operating systems can change as new versions are released. Current Wondershare information lists support for Windows and macOS, with recent versions supporting modern Windows systems and recent macOS versions, including Apple silicon on supported Mac versions.
For a smoother editing experience, hardware matters as much as the operating system. High-resolution footage, AI processing, effects, and complex timelines can place greater demands on your computer.
Before installing Filmora, check the official system requirements for the specific version you plan to use.
Filmora System and Plan Overview
| Area | What to Know |
|---|---|
| Operating systems | Windows and macOS are supported |
| Mac compatibility | Recent versions support Apple silicon on supported systems |
| Editing performance | Depends on CPU, GPU, RAM, storage, footage resolution, and project complexity |
| Free version | Useful for testing the interface and basic workflow |
| Paid plans | Can provide additional features, AI access, updates, creative assets, and watermark-free exports |
| Pricing | Varies by region, platform, and selected plan |
| AI features | Some AI tools may use credits or have plan-based limitations |
| Creative assets | Availability can depend on the selected plan or asset subscription |
| High-resolution export | Available on eligible plans and supported platforms |
Filmora Pricing and Plans
Filmora uses different pricing structures depending on the region, platform, and selected plan. Official store options can include annual and perpetual plans, with differences in AI credits, updates, cloud storage, creative assets, and other features.
Because pricing and included benefits can change, it’s better to check the official Filmora store before purchasing instead of relying on an old price from a third-party article.
The free version can be useful for testing the software and learning its interface. If you need regular watermark-free exports, additional AI features, ongoing updates, or expanded creative resources, a paid plan may be more suitable.
Is Filmora Good for Beginners
Yes. Filmora is approachable for beginners because basic editing operations don’t require advanced technical knowledge.Mac users who want an even simpler editing environment can also explore iMovie, especially for straightforward personal and beginner level projects.
You can start with trimming and splitting clips, then gradually learn transitions, text, audio, colour correction, keyframes, masks, and motion tracking. This gradual learning curve is one reason a Filmora Complete Guide can be useful before starting larger projects.
Is Filmora Good for Advanced Users
Filmora can handle considerably more than basic cutting and transitions. Advanced users can work with keyframes, masks, motion tracking, colour controls, audio processing, compositing, AI tools, motion effects, and more complex timelines.
However, creators working on highly specialised professional productions may prefer applications designed around deeper colour grading, audio post-production, advanced compositing, or large-scale collaborative workflows.
Filmora Pros, Cons, Comparison and Practical Tips
Advantages
- Beginner-friendly timeline workflow
- Large selection of effects and transitions
- AI-powered editing and generation tools
- Strong text and title features
- Useful audio editing tools
- Keyframes and motion tracking
- Colour correction and LUT support
- Screen recording capabilities
- Templates and creative assets
- High-resolution export options on eligible plans
Limitations
- Some advanced features require paid plans or AI credits
- Creative assets may involve separate subscription costs
- AI tools can have usage limits
- Highly specialised professional workflows may require other software
- Large projects with heavy effects can demand capable hardware
Filmora vs Professional Video Editors
Filmora sits between basic consumer editors and more technically demanding professional applications.
Applications such as Adobe Premiere Pro and DaVinci Resolve provide extensive professional workflows, but they can require more time to learn.Final Cut Pro is another desktop editing option worth exploring, particularly for Mac users who want a more specialised video editing workflow. Filmora focuses more heavily on accessibility while still providing features that go beyond basic editing.Another option to consider is PowerDirector, which offers a different balance of editing tools, performance, and creative features for desktop users.
This makes Filmora an interesting option for creators who want more control than a simple mobile editor provides without immediately moving to a complex professional workflow. This comparison is an important part of the Filmora Complete Guide because editing software should be selected according to the project rather than simply the number of available features.
Who Should Use Filmora
Filmora can be a good fit for:
- YouTube creators
- Beginners learning video editing
- Social media creators
- Students and educators
- Travel video creators
- Tutorial creators
- Small businesses
- Freelancers
- Short-form content creators
- Users interested in AI-assisted editing
The software isn’t limited to one specific type of creator. Its combination of basic editing, creative effects, audio tools, templates, and AI features makes it suitable for different experience levels and content types.
Practical Tips for Better Filmora Editing
Start with clean footage instead of trying to fix every problem with effects. Better source material usually makes the editing process easier.
Keep your timeline organised. Rename important assets, separate major elements across tracks, and avoid adding effects simply because they’re available.
For social media videos, pay attention to framing and readability. Vertical content is often viewed on smaller screens, so tiny text and complicated compositions can quickly become difficult to follow.
Use AI as an assistant rather than allowing it to make every creative decision. AI can save time with transcription, audio cleanup, object removal, generation, and other repetitive tasks, but the final pacing and visual direction still benefit from human judgement.
What Makes Filmora Different
Filmora’s biggest advantage isn’t a single feature. It’s the combination of an accessible interface with a broad collection of editing, creative, audio, and AI tools.
The software has also continued to expand with features such as AI Eye Contact, Motion Blur, AI Night View, AI Relight, generative enhancement, expanded masking workflows, Pen Tool improvements, and other editing enhancements.
This shows how Filmora is moving beyond traditional timeline editing toward a workflow where conventional editing and AI-assisted creation work together. For that reason, the Filmora Complete Guide should cover both traditional editing controls and the newer AI features shaping the creative process.
Final Verdict
Filmora is a versatile video editing application for creators who want an approachable editing experience without giving up useful creative controls. It covers the fundamentals such as trimming, transitions, effects, text, audio, and colour correction while also offering advanced tools including keyframes, masking, motion tracking, screen recording, and AI-assisted workflows.
Its growing AI feature set is one of its most notable strengths. Tools for text-based editing, speech-to-text, text-to-speech, audio cleanup, object removal, image generation, video generation, enhancement, and editing assistance can reduce repetitive work and give creators more ways to develop content.
For beginners, Filmora provides a manageable starting point. For experienced creators, it offers enough control for many everyday content projects. The right choice ultimately depends on your editing style, project complexity, hardware, budget, and the amount of control you need.
If you’re looking for an editor that sits between simple template-based apps and highly technical professional software, Filmora is worth considering. Its combination of traditional editing tools and newer AI capabilities makes it a flexible option for modern video editing workflows.
One Comment