Canva Complete Guide: Video Editing Tips & Tools
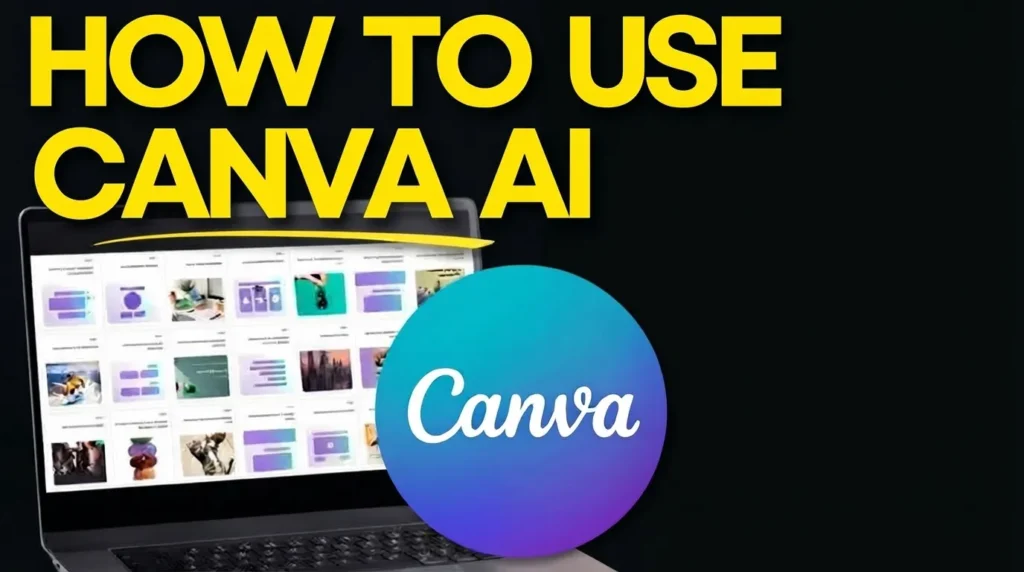
Canva has become more than a graphic design platform. Its video editor gives creators a simple way to trim clips, arrange scenes, add text, music, transitions, animations, captions, filters, and other visual elements without needing a complex professional editing application. This Canva Complete Guide explains how these tools fit together for practical video creation.
The main strength of Canva video editing is its design focused workflow. Instead of learning a complicated timeline from the beginning, you can combine video clips, graphics, text, photos, audio, and templates inside a familiar visual editor. Canva also provides video templates for formats such as YouTube videos, Instagram Stories, TikTok videos, and other content types.
This Canva Complete Guide focuses specifically on video editing and explains how the editor works, which tools are most useful, how AI can speed up certain tasks, how to create social media videos, and where Canva fits compared with more advanced editing software.For more information about different editing tools and workflows, you can also explore photo and video editing app guides on UniversalEdit.
What Is Canva Video Editor
Canva complete guide Video Editor is an online and app based video editing environment that lets users create and edit videos using uploaded footage, stock media, templates, graphics, audio, animations, and text. The editor is designed around accessibility, making it possible to build videos without the technical workflow associated with professional desktop editors.
Canva uses a scene based editing approach that is familiar to people who have worked with presentation slides. You can arrange scenes, trim or split clips, add transitions, and place visual elements directly on the canvas. This Canva Complete Guide treats that scene based structure as one of the core ideas beginners should understand before moving into more advanced tools.
The platform supports video editing on desktop and mobile devices, giving creators flexibility when working from different locations. Canva also provides an extensive media library and customizable templates that can reduce the time needed to build a video from an empty project.
This approach makes Canva especially suitable for social media creators, marketers, educators, small businesses, students, and beginners who want to create visually engaging videos without a steep technical learning curve.
Canva Video Editing Tools and Timeline
The editing area provides the basic controls needed to turn individual clips into a complete video. You can upload your own footage, select stock videos from Canva’s library, place clips into scenes, rearrange their order, and trim unnecessary sections.
Canva’s video editor includes tools for trimming, splitting, cropping, rotating, merging, resizing, adding transitions, and working with audio. A useful Canva Complete Guide should explain these basic controls first because they form the foundation of almost every Canva video project.
The scene based workflow makes simple editing approachable. A creator can create an opening scene, add the main footage, introduce supporting visuals, and finish with a call to action without building a complicated multi track sequence.
Trimming and Splitting
Trimming removes unwanted portions from the beginning or end of a clip. Splitting lets you divide footage into smaller sections so individual scenes can be edited separately.
Rearranging Scenes
Scenes can be moved into a different order, making it easier to change the story structure during editing.
Cropping and Rotating
Cropping can help improve framing, while rotation can correct footage recorded at an incorrect angle.
Video Merging
Multiple video clips can be combined into a single project, allowing you to create compilations, tutorials, product videos, and social media posts.
The workflow is particularly effective for short and medium length content. Projects that require highly detailed multi layer editing, advanced keyframing, or extensive compositing may be better suited to professional software. This is an important limitation to keep in mind when following a Canva Complete Guide for Canva video editing.
Canva Templates for Video Creation
Templates are one of Canva’s most useful features for creators who do not want to start every project from scratch. Canva provides ready made designs for different video formats and content categories, including social media, education, marketing, travel, fashion, food, and other topics.
A template gives you a basic visual structure that can then be customized with your own footage, text, colours, music, images, and branding. For beginners, templates can make the first stage of a Canva Complete Guide much easier because they provide an immediate starting point.
For example, a creator making a travel reel can choose a travel template, replace the sample clips with personal footage, adjust the text, and change the music. A business can take a promotional template and adapt it with product footage, pricing, brand graphics, and a call to action.
Templates also help maintain visual consistency across multiple videos. You can create a recognizable structure and reuse it while changing the content for each new post.
However, templates should be treated as a starting point rather than a finished video. Removing unnecessary elements and adapting the timing to your own footage can make the final result feel more personal.
Text, Captions, Animations and Transitions
Text is an important part of modern video content, especially for tutorials, advertisements, educational clips, short form videos, and videos viewed without sound.
Canva lets users add text to specific sections of a video and customize fonts, positioning, animation, and appearance. Its video tools support subtitles, captions, descriptions, and other text elements directly within the editing environment. These features make text editing an important section of any Canva Complete Guide for creators producing informative or social media focused videos.
Animated Text
Animated titles can introduce a video, highlight an important statement, identify speakers, or present calls to action. Canva includes animation options that can be applied to text and other design elements.
Captions
Captions improve accessibility and can help viewers follow spoken content when audio is unavailable. Canva also provides customizable captions that can be adapted to a creator’s visual branding.
Transitions
Transitions connect one scene to another. Simple fades, slides, and other effects can create a smoother flow between clips.
Graphics and Stickers
Canva’s design focused environment makes it easy to combine videos with shapes, stickers, illustrations, icons, and other visual assets.
The main editing principle is restraint. Too many animations, fonts, and transitions can distract from the actual message of the video.
Audio, Music and Sound Effects
Audio can change the entire character of a video, and Canva provides tools for adding music, sound effects, narration, and other audio elements. A strong Canva Complete Guide should treat sound as part of the storytelling process rather than an optional finishing touch.
Users can upload their own audio files or select music and sound effects from Canva’s media resources. Canva also supports multiple audio tracks within its video editing workflow.
Background Music
Background music can establish mood and help maintain energy throughout a video. The music should support the content rather than compete with narration or dialogue.
Voiceovers
Voice narration can be used for tutorials, explainer videos, product demonstrations, presentations, and educational content.
Sound Effects
Sound effects can make transitions, animations, and important moments more noticeable. Small audio details can add structure to short form videos.
Audio Balance
Voice should normally remain clear when music is playing. Lowering background music during spoken sections can make the final video easier to understand.
Canva’s audio workflow is particularly convenient for creators who want to combine music and visual content without moving the project into a separate audio editor.
Canva AI Tools for Video Editing
AI has become an important part of Canva’s video workflow. Canva provides AI powered tools that can assist with editing, content generation, background removal, and creating video assets from text prompts. For users following a modern Canva Complete Guide, understanding these AI tools can help reduce repetitive editing work.
Magic Video can take uploaded clips and a description of the desired result, then assemble footage with smart cuts, sequencing, audio, transitions, and layouts.
Magic Media can also generate video content from written prompts. Canva’s official documentation states that generated videos can be created through the Magic Media Videos section and then added to a design.
Highlights
The AI powered Highlights feature analyzes footage and identifies important moments that can be turned into shorter clips for social sharing.
Video Background Remover
Canva Pro includes a Video Background Remover that can isolate a subject and remove the background without requiring a green screen. This can be useful for tutorials, product videos, promotional content, and creative compositions.
AI Generated Video
Canva’s AI tools can also generate short video assets from text prompts. These generated elements can then be refined inside the editing environment.
AI is most useful when it reduces repetitive work. The generated edit or footage should still be reviewed manually because timing, subject selection, visual consistency, and storytelling require human judgment.
Canva for YouTube, TikTok and Social Media Videos
Canva is particularly well suited to creators who produce videos for social platforms. Its templates, resizing tools, animations, captions, graphics, and media library make it easier to adapt content for different formats.
For TikTok, Instagram Reels, and YouTube Shorts, vertical video layouts can help creators work within the expected aspect ratio of these platforms. Canva also provides presets for social formats and tools for resizing existing projects.
YouTube creators can use Canva for intros, outros, thumbnails, explainer videos, presentations, tutorials, and short promotional clips. This flexibility makes social media content an important part of a broader Canva Complete Guide to Canva video editing.
Short Form Content
Short videos benefit from a clear opening, fast pacing, readable text, and strong visual structure. Canva’s templates and animation tools can make this format easier to build.
Educational Videos
Teachers and creators can combine screen recordings, text, images, diagrams, and narration to create instructional content.
Business Videos
Brands can build product demonstrations, advertisements, announcements, presentations, and social media campaigns while keeping their visual identity consistent.
Personal Videos
Travel montages, birthday videos, event recaps, slideshows, and memory projects can also be created using Canva’s video templates and editing tools.
The advantage is that the same project can often be adapted into different dimensions instead of rebuilding the entire video for each platform.
Canva Video Editing Workflow for Beginners
A simple workflow can make Canva easier to learn. Begin by deciding what the video needs to communicate before adding visual effects. This planning stage is often overlooked, but it can make the rest of the Canva Complete Guide much easier to follow.
First, create a new video project or select an appropriate template. Then upload your clips and arrange them in a logical sequence.
Next, trim sections that do not contribute to the story. Add supporting footage, images, and graphics only when they improve the message.
After the basic sequence is complete, add text, captions, music, transitions, and animations. Keep these elements consistent so the video has a unified visual style.
Finally, preview the complete video from beginning to end. Check audio levels, text readability, scene timing, transitions, and mobile viewing before exporting.
Beginner Workflow
| Step | What to Do | Main Goal |
|---|---|---|
| 1 | Choose a template or blank project | Establish the video format |
| 2 | Upload and arrange footage | Build the basic story |
| 3 | Trim and split clips | Remove unnecessary content |
| 4 | Add text and captions | Improve clarity |
| 5 | Add music and sound effects | Improve the audio experience |
| 6 | Add transitions and animations | Connect scenes smoothly |
| 7 | Preview and refine | Fix timing and presentation |
| 8 | Export the final video | Prepare content for publishing |
A useful editing habit is to complete the basic cut before adding decorative effects. This prevents you from spending time animating clips that may later be removed.
Canva Video Export, Resizing and Sharing
Once editing is finished, the project needs to be prepared for its final destination. Canva allows users to download completed videos as MP4 files and provides sharing options directly from the platform.
The correct dimensions depend on where the video will be published. A landscape YouTube project may require a different format from an Instagram Reel or TikTok video.
Canva’s video resizing tools can help adapt a project for different platforms, including Instagram Reels, YouTube Shorts, and TikTok. Understanding these output options is an important part of this Canva Complete Guide, especially for creators publishing the same content across several platforms.
Before exporting, review the following areas:
| Check | Why It Matters |
|---|---|
| Video dimensions | Prevents unsuitable framing |
| Text placement | Keeps important information visible |
| Audio levels | Makes dialogue easier to hear |
| Clip timing | Keeps the video engaging |
| Transitions | Prevents distracting scene changes |
| Captions | Improves accessibility and clarity |
| Final preview | Helps identify mistakes before publishing |
For online publishing, it is also useful to watch the exported file after downloading it. Compression can sometimes change the appearance of fine text, visual details, or audio compared with the editor preview.
Canva Advantages, Limitations and Best Uses
Canva’s biggest advantage for video editing is accessibility. The interface is easier to approach than many professional editing applications, and users can combine video editing with graphic design inside the same project.
The platform is particularly useful for social media creators, marketers, educators, businesses, and beginners who need polished visual content without spending a long time learning a complex editing environment. These audiences are central to understanding where Canva fits within a broader Canva Complete Guide to video editing software.
Its template library is another major strength. Creators can start from a predefined structure and adapt it to their content instead of designing every scene manually. Canva also provides stock media, audio, animations, graphics, and AI powered features in the same platform.
There are also limitations. Users working on complicated professional productions may find Canva less flexible than applications designed specifically for advanced timeline editing, colour grading, visual effects, and detailed audio post production.Creators looking for a more advanced professional workflow can also explore our DaVinci Resolve guide for detailed editing, colour grading, Fusion, and audio tools.
Canva’s scene based workflow is excellent for quick and design focused projects, but editors who need deep control over multiple video layers, advanced keyframes, complex compositing, extensive colour correction, or sophisticated audio mixing may eventually need a more specialised editor.For users looking for another dedicated video editing option, the Filmora Complete Guide covers its editing tools, effects, transitions, and workflow.
| Area | Canva Strength | Possible Limitation |
|---|---|---|
| Ease of use | Beginner friendly interface | Less control for complex projects |
| Templates | Large collection of ready made designs | Templates can make projects look similar |
| Graphics | Strong design and visual assets | More design focused than film focused |
| Audio | Music, narration, and sound effects | Limited compared with dedicated audio software |
| AI | Editing assistance and content generation | AI results still need review |
| Social Media | Excellent for platform focused content | Less suited to demanding long form productions |
| Collaboration | Easy cloud based workflow | Advanced production workflows may need specialised tools |
For quick promotional videos, social media posts, educational content, presentations, tutorials, and branded clips, Canva can be an efficient choice. For cinema style productions or highly technical post production, a professional editor may provide greater depth.For quick promotional videos, social media posts, educational content, presentations, tutorials, and branded clips, Canva can be an efficient choice. For cinema style productions or highly technical post production, a professional editor may provide greater depth. Mac users comparing professional workflows can also explore Final Cut Pro for a more dedicated video editing environment.
This Canva Complete Guide therefore positions Canva as a practical design focused video editor rather than a direct replacement for every professional post production application.
Final Verdict
Canva has developed into a capable video creation and editing platform that combines video tools with the visual flexibility of a design application. Its biggest strengths are ease of use, templates, graphics, animations, audio resources, social media formats, and AI assisted editing.
For beginners, the learning process is relatively straightforward because the interface presents video creation through scenes and visual elements rather than a highly technical production environment. More experienced creators can also benefit from its fast workflow when producing short marketing videos, social content, presentations, or branded assets.
The best results usually come from using Canva’s tools selectively. Start with a clear sequence, improve the pacing, add readable text, balance the audio, and then use transitions, animations, and AI features where they genuinely improve the content.
Canva is not designed to replace every professional video editor. Its real strength is making video creation accessible while bringing editing and graphic design into the same workflow.
For creators who value speed, design flexibility, templates, and simple editing, Canva remains a practical option for producing modern video content. This Canva Complete Guide provides a foundation for choosing the right tools and building a workflow that matches the type of content you create.